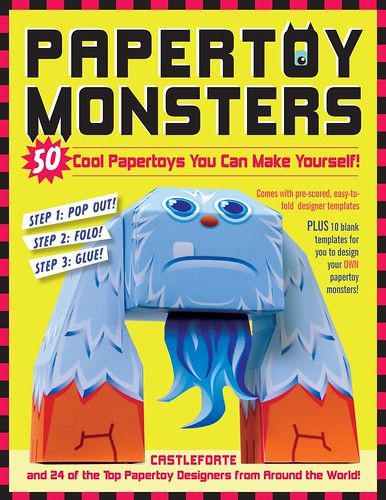
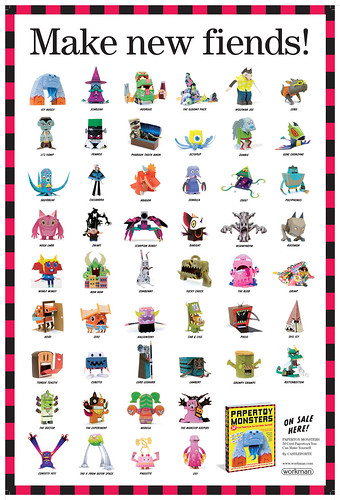
Showing posts with label Crafts. Show all posts

PaperToy Monsters Book Review and GIVEAWAY

papertoy

Papertoy Poster final.indd

PAPERTOY MONSTERS
Make Your Very Own Amazing Papertoys!
By Brian Castleforte
Paperback , 124 pages
ISBN: 9780761158820 (0761158820)
Published by Workman Publishing


My Review (Video by 7yr old Max & his Daddy):


From the Publisher:
A breakthrough paper-folding book for kids—paper airplanes meet Origami meets Pokemon. Papertoys, the Internet phenomenon that’s hot among graphic designers and illustrators around the world, now comes to kids in the coolest new book. Created and curated by Brian Castleforte, a graphic designer and papertoy pioneer who rounded up 25 of the hottest papertoy designers from around the world (Indonesia, Japan, Australia, Italy, Croatia, Chile, even Jackson, Tennessee), Papertoy Monsters offers 50 fiendishly original die-cut designs that are ready to pop out, fold, and glue. The book interleaves card stock with paper stock for a unique craft package; the graphics are colorful and hip, combining the edginess of anime with the goofy fun of Uglydolls and other collectibles. Plus each character comes with its own back-story.

And the results are delicious: meet Pharaoh Thoth Amon, who once ruled Egypt but is now a mummy who practices dark magic in his sarcophagus. Or Zumbie the Zombie, who loves nothing more than a nice plate of brains and yams. NotSoScary, a little monster so useless at frightening people that he has to wear a scary mask. Yucky Chuck, the lunchbox creature born in the deepest depths of your school bag. Plus Zeke, the monster under your bed, Nom Nom, eater of cities, and Grumpy Gramps, the hairy grandpa monster with his very own moustache collection.

GIVEAWAY

1. US & Canada residents only, no PO Boxes.
2. Leave me a comment with your email address.
3. PaperToy Monsters provided by Workman Publishing, Shipping provided by Beachbrights.
4. It's that easy to enter! Contest ends Sunday, July, 17th @ Midnight.

Resource Links:
PaperToy Monsters on YouTube
Brian Castleforte

Embellishing Wellies (Rain Boots) with Ribbon

IMG_5999

Nothing would make me prouder than to tell you I have nothing better to do than embellish my rain boots but this would only be a half truth. The whole truth is that I have these really large calves and no boots in the world boots do not fit me. It's a terrible cross to bear.

So, in comes getting creative.  I found these rain boots at Walmart for ~$25, the grommets came from Hobby Lobby (buy more than you think you will need) and I had the ribbon. Any kind should work as well as a scarf, fabric strips etc. Be creative!

IMG_5958

Step 1: Cut the boot as deep as you need it. Right down the center.

Picnik collage

Step 2: Add the grommets per the instructions on the package. You might can buy more industrial grommets than the ones I bought. These little guys felt flimsy and were not the easiest to work with, hence the buy more than you think you will need.

IMG_5970

Step 3: Thread your ribbon & tie a bow.

IMG_5975

Step 4: Enjoy boots that fit over your calves & have personality!

Picnik collage

Now, if I could just get some rain!
~XOXO~


What to do with a Formal Living Room. My Craft Room!


**warning, picture overload!**


Before (as a formal living room):
IMG_1308

After:
IMG_4697

IMG_4698

IMG_4696

IMG_4689

IMG_4685

Byron's Desk:
IMG_4684

IMG_4681

IMG_4678

IMG_4677

IMG_4674

Getting Power to the Island:
I had an electrical outlet added to the ceiling since my house is built on slab. This was way cheaper than busting up concrete and I don't have to drape electrical cords to the wall outlets.
IMG_4673

IMG_4672
*Sorry about the cat being in the photos, she is one of these cats that you don't mess with when they are relaxing. Unless you want to lose a finger or two!

Resource Guide:
Rugs: Ikea
Stools: Overstock
Cabinets: Home Depot
Countertop: Formica
Canvas Baskets: Walmart
Knobs & Pulls: knobdepot.com (I ended up spray painting them because the color does not look like the photo and I had to order special screws to fit my drawers...a real pain!!) The round knobs are cheapies from Home Depot.
Bulletin Board: Beachbrights
Desk Chair: Ikea
Desk Legs (Byron's Desk): Ikea, not online, vika fintorp
Shelves & Brackets: Ikea: The wood shelves came unfinished from Ikea, not online.
Paint: Behr Black (not sure, but very black)
Curtains/Rods: Ikea (I still need to make these look better!!)

Island: Byron made with base cabinets from Home Depot, Bead Board Paneling attached to the back and Fence Posts for legs.

Anyone want to come over and craft/sew with me?

This Week's Collection

Here are some of my favorite images that I collected this week. Happy Friday & weekend!
Just click on the picture for the link!


DIY Scroll Mirror
step05


I. Want. This vanity.
S_0906_keen2


I could go crazy with my Silhouette machine.
Laundry-Room-Design_Interior-Design-Ideas_1


DIY Planter turned Birdhouse
IMG_1744


An awesome house made from shipping containers.
Home-Contained-02


DIY table made from plumbing pipe.
1012_frugal02_rect540


I will re-create this, this summer. LOVE.
905img96l.1300796816


~XOXO~


Mark Montano's Big Ass-Books and a GIVEAWAY

montano

It's been way to long since I have hosted a giveaway. So, how about a 2 book giveaway?

I am sure you all know who Mark Montano is...if not, no worries, I am going to tell you.  Mark is a TV Host, Designer, Author and Artist.  From what I know of Mark, you can add "Classy" to the list.

As some of you know, I have reviewed one of Mark's books, The Big-Ass Book of Home Decor. Mark found my video review on YouTube and asked if I would review his other books. He also sent me additional copies to giveaway to you!

He is my video review of The Big-Ass Book of Crafts:


My video review of Pulp Fiction:


Now for the 2 book giveaway:
1. US residents only, no PO Boxes.
2. Leave me a comment with your email address.
3. Books provided by Mark Montano, Shipping provided by Beachbrights.
4. It's that easy to enter! Contest ends Friday, March 25th @ Midnight.


Be sure to check out these great links:
Design Originals

The Pig and That Very Angry Bird

pig

Well, I did it. I made The Pig. More importantly the little dude made a movie. Making this Pig was so frustrating, watching him play with it, was so worth it.


~XOXO~

My Angry Bird Post HERE

Angry Birds Plush Toy - - DIY

IMG_4186

It started this weekend.  I went to lunch with 2 other families from Max's basketball team. One of Max's friend's little sister showed up to lunch crying.  Not just whining crying but big alligator tears of sadness.  It turns out that her dog Pinky, had eaten her plush Angry Bird toy.

Hmmmm, I can make one of those I thought to myself! So, today I did. It was not hard. I had to re-read the directions several times but it all came together.  I bought all the materials from Walmart and the project took me 2 hours to complete...with several interruptions!

I was going to give Hannah her new Angry Bird today but I did not see her in carpool line.  So I had to bring the bird back home with me. Guess who is sleeping with the Angry Bird?  I think I'd better make another one tomorrow!!

Thank you Obsessively Stitching for the amazing tutorial.

XOXO-

Resource Links:
Buy one from Amazon


IMG_4183

How to Fill a Wall with DIY Art

IMG_4008

I needed a focal point.  Kinda a "lesser or two evils" focal point.  Please excuse the wall color and the "hot mess" of a living room.  I do things backwards. I hang art only to have to take it down to paint the walls. I am living in a combobulated state.

Here's my inspiration:

Cottage_Living_NovemberDecember_2008_page_112
Credit: Cottage Living

What you need:
Canvases (I used 24"x24")
Compass
Paint (I just used poster paint)
Sharpie
Math skills

IMG_4006

IMG_4005

This is my craft room. It's a mess. Why did I think it was a good idea to make this room the first room you see when you walk into my house? Sheesh!  I promise to blog about this craft room soon!!

My "I am still in the middle of remodeling/decorating" living room. I told you I needed a new focal point! Just keep'n it real :)
IMG_4009

Anyone know of a good trim carpenter / handyman in Houston?

~XOXO~

Also check out this DIY Tutorial with Posters...


Today's Creative Blog

DIY Artwork ~Turn a Poster into a Canvas~

I am having the hardest time finding art for my house. I just can't find what I like!! However, I did find this poster at Ikea for about $10. I am not crazy about poster frames or glass frames in general for art, so I turned this poster into a hanging canvas.

What you'll need:
Poster
Canvas
Glue

IMG_3508

1. Cut your poster to size. Mine was about 2-3 inches smaller than the canvas.
IMG_3509

2. Spread glue on the canvas. I used Mod Podge & a Sponge Brush.
IMG_3510

3. Work fast for these next steps. You don't want the glue to dry on the canvas.  Wet your poster. Yes, I said wet your poster. I used my bathtub for my larger poster.  You must wet the poster in order to make it easier to work with. Trust me. Soak the poster for about 10 seconds.
IMG_3511

4. Place the wet poster on top of the glued canvas. Try and place where you want the poster to permanently stay. Every second that passes makes adjusting the poster that much harder. Start smoothing out the ripples and air bubbles. Wet fingers to keep from tearing the poster.
IMG_3512

5. Keep checking your poster and try to smush down the air bubbles. When the poster dries, most of the air bubbles will disappear. Don't panic. There's a fine line between getting rid of all the bubbles and tearing your poster.
IMG_3514

6. After it dries for an hour or two. Top the poster with a coat of glue (or two!).
IMG_3517

7. Let dry for 24 hours & hang.
IMG_3534

8. ENJOY!!!  The poster will not be perfect. Almost but not perfect. The more variations in the poster (color & pattern) the better for this project.

XOXO-

Check out my Star War's Posters HERE

Linked with Southern Crafty Mama

DIY Business Cards

IMG_3521

IMG_3522

I wanted a simple business card to include in my shipment of books that I send out every once in awhile. I love the vintage look of these shipping tags.  They were easy & fun to make. However, I do recommend some stamping experience. I, do not have any, and my stamping has a lot to be desired!

Shopping:
Changeable Stamp (not mine but close)
IMG_3520

Go forth and make!
XOXO

Inspiration from HERE


Today's Creative Blog


Tute yourself tuesday red and white