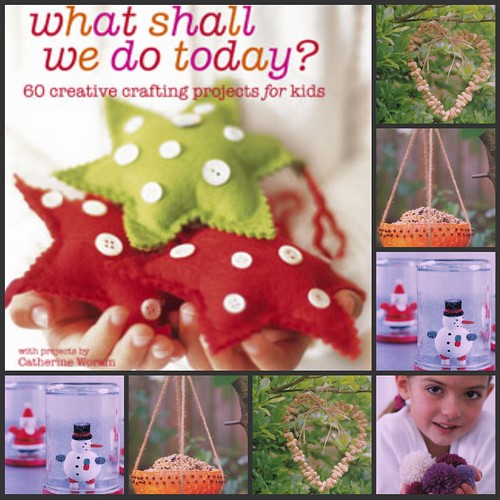
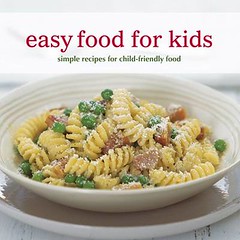
CookBook Review: Easy Food for Kids (& Giveaway)


9781845978976

Easy Food for Kids

Ryland Peters & Small
October 2009
Specs: 240 pages, 120 color photos
ISBN: 9781845978983


My Review: Let me first be honest here. I am writing this review while eating a Poptart, so my culinary choices might not be right for reviewing a cookbook but this cookbook is for kids and I have one of those. So, I am at least partially qualified. There also might be a cultural differences in this cookbook.  I reside in the United States and this book is published by Ryland, Peters & Small, who have a strong presence in London.

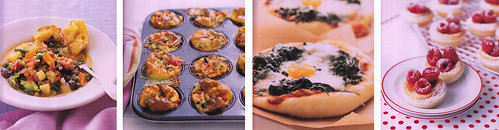
This would be a great cookbook, if you were not a kid.  Unfortunately, the title says "child-friendly food" so I can not give this cookbook high marks.  How many kids do you know that will eat the following: smoked mackerel pate (pg. 61), leek frittata (pg. 74), fiorentina pizza (pg. 120), herby trout triangles (pg 122) and fish pie (pg. 145).  I can see my son's gag reflex in full glory.

I might not be able to recommend this book to kids but it is a great cookbook for adult taste buds. The book is divided into 6 basic chapters: breakfast & brunch, soups & snacks, lunchboxes, hot dishes, desserts and teatime treats. The ingredient lists for each recipe are minimal, time saving and the flavors seem appealing. I did not try any of the recipes for this review. I like the size of the book (7.5" x 7.5") and the color pictures are nice and coordinate well with each recipe.

If you have a child that will try anything, with far reaching tastes, than this cookbook is for you. It will bring a little variety to your meals and the recipes are easy enough that kids could help in prep--making this even more delightful!

2.5 out of 5 stars.

easyfoodforkidscollage


From Publisher: It is often difficult to get children to eat the nutritious meal you have lovingly prepared for them. Easy Food for Kids is packed with more than 100 easy recipes for good, honest food that children will love to eat, and which dont demand lots of your time. 

Whether the little ones are off to school or the whole family is having a lie-in on the weekend, theres a recipe in the Breakfast & Brunch chapter to get everyone off to a storming start. Extra Oaty Porridge and Blueberry Pancakes will be gobbled up in no time. 

Salads, Soups, & Snacks are for those quick meals and munchies when you need something light but nourishing to keep the kids going. Pea and Ham Soup, Thai Chicken Noodle Salad, and Parmesan Breadsticks are healthier than store-bought crackers or potato chips. Making the kids Lunchboxes will ensure that they have a varied diet. Chicken Wraps with Mango Chutney and Cucumber and hot, sweet Butternut Squash Soup will be just what the kids need halfway through their school day. 

For evening and weekend meals, the Hot Dishes chapter caters for every type of hunger. Meatloaf, Fish Cakes, Roast Chicken, Pasta with Ham and Peas, and Chili Con Carneentres this delicious will be loved by kids and adults alike. 

And with Desserts like Brownies and Almond Fruit Crumble, you can reward good eaters with a sweet treat. Get the kids to join in when you bake some Teatime Treats like Apple Cake and Double Chocolate Muffins. Or let them help you make Drinks such as the Mango Smoothie or Strawberry Milkshake, perfect for starting the day or coming home from school.

~~~~~~~~~~~~~~~~~~~~~~~~~~

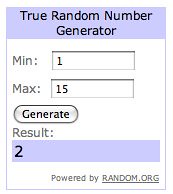
I am giving away my review copy of 
"Easy Food for Kids" to one lucky follower. 
Winner will be announced Wednesday. So, FOLLOW ME!!
or RSS me!


XOXO-
**Thank you Marny from Ryland, Peters & Small for the opportunity to review this book**


CymLowell

WINNER of "What Shall We Do Today"!

What shall we to today

Actually, I picked 4 winners (well, Random Generator picked 4 winners).
I just could not help myself.
(Please, do not tell Byron)

Drum Roll Please...


Contact me with your shipping address, please.
beachbrights@gmail.com


XOXO-

**Original post here with Snow Globe craft.**


Paula Dean's Furniture


I saw a furniture ad in my Sunday paper and had to take a closer look. Paula Dean (Queen of Butter) has her very own furniture line, I did not know. I guess it has been awhile since I went furniture shopping! What do you think?

PBar-
This is called Paula's Cabinet. The ad listed it for $1599. It has a hutch with a Dutch bonnet crown and two doors that open to reveal an antique mirrored back. There is storage room for your barware, a bottle opener, and one of the doors has a chalkboard on the inside.


RushAChair
The Rush Seat Accent Chair, features a generously sized down-blend seating cushion placed on top of a rush seat. This chair also has an exposed wood frame. The chair has a tight upholstered back which along with the seat cushion is covered in a teal and mocha stripe. The accompanying kidney pillow is covered in one of Paula’s favorite fabrics, a rooster and plaid pattern, and finished with a decorative braided trim. I do not have a price.


BLadyCab-1
The Paula Deen Home furniture collection from Universal Furniture features many pieces for a casual, relaxed and comfortable lifestyle. The Bag Lady's Cabinet is named after her first small start-up catering business, The Bag Lady. The list the price $1299.


PaTable
Dining rooms take center stage when you entertain. More than just a place to eat, a dining room can be a comfortable and cozy gathering place. With Paula's fondness for entertaining you could certainly expect her to provide dining pieces in her Home collection. Paula’s Upholstered Side Chair is slip-covered and comfortable. Table and 4 side chairs $1299


CBackChair
The Cameo Back Wood Chair was inspired by fabrics and furnishings in Paula Deen’s own Savannah home. The elegant Cameo Back Wood Chair is scaled to stand alone, or be part of a group setting. The chair has a carved exposed wood frame with an antique white finish and silver tipping. No price given.


corcab
Corner cupboards are very space efficient storage options for kitchens or dining rooms. Paula Deen's Corner Cupboard has a contrasting bead board interior and two adjustable shelves for display. No price given.

All descriptions courtesy of Universal Furniture.


XOXO-

Turkey Cookie Tradition

r40040fp

I know that you have all seen this image.  Well several years ago, my then almost 3 yr old, saw this image too. So, for 3 years now, we have been making these cookies. He loves it.  After taking several batches to all the neighbors, the rest get packaged up and follow Max to school in the morning.  Win-win.

The Ingredients
IMG_8239


Max attaching candy corn feathers.
IMG_8242


Don't judge. I was tired and left off the feet. He did not notice so don't say anything (sh!)
IMG_8246


I have been on a bit of a blogging binge the past two week and will be taking the rest of the week off. However, I will take a few minutes on Friday to announce the winner of the "What Shall We Do Today?" book giveaway (there is still time to enter).

Happy Thanksgiving-

XOXO

DIY Glass Magnets


IMG_8228

Picture #5


What you will need:
Glue
Clear Flower Marbles 1/2” minimum size
Craft Papers with a Small Pattern
1/2” Magnets
Scissors
Pencil
Small Tins (dark color is better is using chalkboard paint)
Primer Spray Paint (if your tin is a light color)
Chalk Board Paint (if you want tin's you can write on)

Picture #2

1. Lay the clear flower marbles out on a surface, flat side up.
2. Use a dime or small circle to trace patterns out of scrapbook paper. The heavy stock papers work better.
3. Add a small dab of glue to the top of the flat clear flower marble and put the paper image (image side face down) on the marble.

Picture #3

4. Give the glue a few minutes to dry, then add another drop of glue to the back of the paper and add the magnet. Let these dry throughly.
5. Spray the tin with primer, let dry (one coat should be fine).
6. Spray the tin with 1-3 coats of chalk board paint, allowing to dry between coats.
7. Cut a circle out of scrapbook paper to line the bottom of the tin, glue in place.

Picture #1
(These are some tins I did at Halloween with Chalkboard paint)

Not only can you do seasonal gifts. But these little magnets also work great as party favors or even little travel games! I used electrical tape for the tic-tac-toe board in one of the first pictures.

I love crafts that can be enjoyed with kids, given as gifts and that are super easy. This craft takes less than 15 minutes to complete. Enjoy!

XOXO-

What Shall We Do Today?


What Shall We Do Today?
60 Creative Crafting Projects For Kids
9781845978860

Author: Catherine Woram
Ryland Peters & Small
August 2009
ISBN: 9781845978877
Specifications:
160 pages, 300 color photos, 9' x 9.25"


My Review: I enjoyed this book!  In fact, I have marked several of the projects to complete over the Thanksgiving holidays. For this review, I completed the Snow Globes project on page 129. Max and his friends had so much fun doing this project. The Snow Globes were so easy and relatively fast for my 5 year old's attention span -- a perfect combination!

The projects range from the classics; Paper Mache, Finger Puppets to some newer projects; Crystallizing Pansies, Modeling with Balsa Wood. The color pictures are bright and descriptive. The instructions average around 5 step and are easy to follow.  The items needed for the crafts are simple to find.

The book is divided into 4 sections; Spring, Summer, Fall and Winter. Very creative!  Some of the additional projects I can't wait to try...Pompoms, Peanut Heart, Pumpkin Birdseed Feeder and the Snow Globes (see below for my pictures & snow globe tutorial).

WhatShallWeDo


From the Publisher: For children, the experience of creating is every bit as important as the end result. Making, baking and growing will fire their imaginations and offers an inspiring alternative to endless hours spent in front of the computer or TV screen. What Shall We Do Today? is packed with more than 60 colourful, fun and imaginative projects by Catherine Woram, designed especially for boys and girls aged between three and 12 years. The book is arranged by season, and each section is crammed full of ideas for fun crafts, great gifts and pretty decorations to keep children busy during the long summer days and rainy afternoons alike. Every project can be completed using readily available materials and in five or fewer steps – just follow the step-by-step instructions and you can't go wrong!

~~~~~~~~~~~~~~~~~~~~~~~~~~~~~~~~~~~~~~~

Here are the Snow Globes from page 128.  Max had a blast adding all the ingredients to the jar and picking out an ornament.  The night before we planned to make these snow globes, I glued all the ornaments to the lids and let them dry overnight. I also sealed the ornament with a spray polyurethane. This is not noted in the instructions.

I bought all my items from Walmart.
1. Glass Jars
2. Distilled Water
3. Glycerin
4. Clear Liquid Dish Soap
5. Glitter
6. Strong Waterproof Glue
7. Ornament/Figurine
8. Craft Silicone Sealant, optional

IMG_8165


Glue the ornament to the jar lid. Let dry overnight and spray with sealant (polyurethane).
IMG_8166


I used baby food jars for the smaller snow globes.
IMG_8168


Fill the jar with distilled water. Get it as full as you can but take into consideration the weight of the ornament.
IMG_8171


Add approximately 2t of glycerin, 1/2t of dish soap.
IMG_8169


Add 5-6t of glitter.
IMG_8172


Add silicon sealant around the lid for a leak proof seal. Shake & enjoy!
IMG_8176

~~~~~~~~~~~~~~~~~~~~~~~~~~~~~~~~~~~~~~~

GIVEAWAY CLOSED!!

Because I loved this book so much, I am giving away a copy! If you follow my blog, you are already entered. For an additional entry and to increase your chances of winning you can do the following:


(+1 entry) Twitter about this book/contest with the link to this post, make sure you leave me a comment telling me you have twittered.


(+1 entry) leave me a comment, any comment!


Contest ends Friday, November 27th. Canada & US Residents Only (Sorry!).

XOXO-


You can buy What Shall We Do Today by Catherine Woram from Amazon and other fine book retailers.

**Thank you Marny from Ryland Peters & Small for the opportunity to review this book**


CymLowell


DIY Day @ ASPTL

Totally Tulle Tutorial - No Sew!

TulleComplete

I had to borrow a cute little neighbor girl for this tutorial. Max just would not have it. I even told him I would buy him something Star Wars -- He still said "No Way"!  That's OK, cute McK to the rescue...

What you need:
1. Tulle by the yard. You can buy this at Hobby Lobby, JoAnns, Fabric Stores and Walmarts with Craft Departments.  I bought 5 yards and had plenty left over.
2. Elastic.  You can buy it packaged in the notion section of the above stores. I bought 1/8 inch Braided Soft Stretch Elastic. There is no wrong here, any thickness should work. Even ribbon should work.  Cut the elastic/ribbon to fit your child's waist and tie the ends together (if using elastic). If you are using ribbon, I would knot near the ends so the tulle will not slide off but leave enough ribbon to tie around your child's waist in a bow.
3. Misc. ribbons, jewels, garlands, trims etc.

TulleHowTo

How-To: After measuring the elastic to fit and tying  the ends together, stretch around a pot, notebook or chair (like I did). Cut the tulle into ~14 inch strips. Tie each strip around the elastic. You can stack two different colors on top of each other and then tie around the elastic. Really, anything goes!  Continue adding tulle strips until the elastic is covered. You can make the tulle as full or thin as you like. Then tie about a dozen ribbons, spaced evenly around the skirt.

Check out this site for other ideas.

TA - DA!

IMG_8198
Even Daisy got in on the fun!

**This would be a great skirt to make with your children and donate to the Princess Alexia Foundation** Please check out their link and consider donating. This is an amazing organization!


PrincessAlexaFoundation


XOXO-

DIY Magazine Blog: How to Set a Formal Table

Have you seen my guest post over at DIY Magazine's Blog: Team DIY?  Head on over and check it out...I promise to take the stress out of setting your holiday table!

Picture 1

While your there, be sure to leave me a comment on any of your "Table Setting" tips.

At Home with White by Atlanta Bartlett

9781845973490


At Home with White by Atlanta Bartlett

Authors: Atlanta Bartlett & Karena Callen
Photographer: Polly Wreford
Ryland Peters & Small
March 2007
ISBN: 9781845973490

My Review:
I love this book. Even though my style is more Pottery Barn (Yes, I am sure Atlanta Bartlett is cringing if she ever reads this review), I am a lover of white.  This book captures the essence of white and will now become my "go to" for all things white.

white2

Just the other day, I bought this dark stained ratty thrift store dresser and in my mind I wanted it to become a worn shade of white. I was not sure how to execute this look but after spending some time looking over the pages of this book, I had the confidence to achieve the look I wanted.

6a00e55225716d8833011570afcc64970b

This book is about texture and shine. Atlanta Bartlett takes you through several themes: classic, romantic, beach, country and modern. There is really something here for all styles.

If you do any decorating, either your own personal home or professionally, then this book needs to be in your library.  This is the Bible on all things white.

Think Shabby Chic meets Anthropology meets Vintage Eclectic.

athomewithwhiterev


Publisher's Review:
White can work in every home. Classic, timeless, easily adapted to changing fashions, and excellent for maximizing light, it is far from bland or boring. Authors Atlanta Bartlett and Karena Callen begin by showin you How to Use White to create a multitude of environments--from warm and homey through to cool and calm--with different textures and shades. Next, Creating a Mood with White describes five themes, Classic, Romantic, Beach, Country, and Modern, and demonstrates how to design a successful white interior. Finally, Living with White illustrates, room by room, how to make white right for you. From bedrooms to bathrooms, you'll see that white is the most versatile colour for contemporary living. Explore these inspriational interiors and easy-to-achieve ideas, and transform your one with white. *With elegant photography by Polly Wreford.


You can learn more about Atlanta Bartlett on her website. At Home with White can be purchased from Amazon.


XOXO-

Hooked on Houses

Turning Crayons into Crayon Shapes

IMG_8155

I know this project has been done like a thousand times BUT I have never done this. Max has been feeling a little under the weather, so I thought this might keep him calm for like 5 minutes or so. It worked!

Now, I bought new boxes of crayons. Yes, don't judge, it was just easier.  Since, Max has never liked crayons or art or drawing or crafting, I don't have used crayons laying around my house. Hence the new.  I also bought this "cookie" pan from Walmart.  I wanted Christmas shapes.

Basically this is the craft in a nut shell:
1. Peel paper off crayons. Why this was hard, I don't know. Maybe it was my cheap-o crayons but the paper was hard to peel off. Like 5 year old hard.
IMG_8152

2. Break crayons into small pieces.
IMG_8153

3. Spray cookie sheet/muffin tin with cooking spray. This is the label from the pan I bought at Walmart.
IMG_8145

4. Place broken crayon 3/4 full into cookie sheet spaces or muffin tins.
IMG_8154

5. It looks better if you place red-orange-pink-yellow together and blue-green-purple together. Otherwise, the colors can run together and make brown.
6. Preheat oven to 350 and cook for about 8 minutes.
IMG_8144

7. When they are 100% liquid, take out of the oven. Let them cool for a couple of minutes and then place in the freezer for faster cooling or not.
IMG_8157

8. Ta-Da!
IMG_8160

XOXO-


WINNER!


Picture 1

Congrats Loving Life in Southern California!
Be sure to check out her fantastic blog IMAGINE.

9780316056625_388X586

(you will LOVE the art deco illustrations!)

ENJOY-
XOXO