
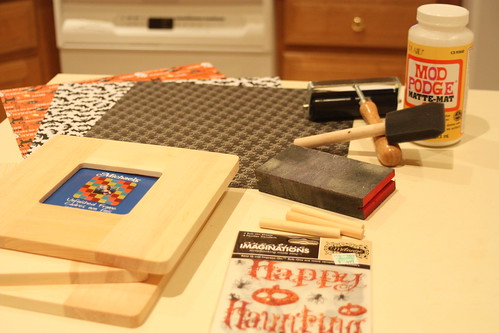
What you need:
Unfinished Wood Frame (I bought my from Michael's)
Glue (ModPodge)
Scrapbook Paper
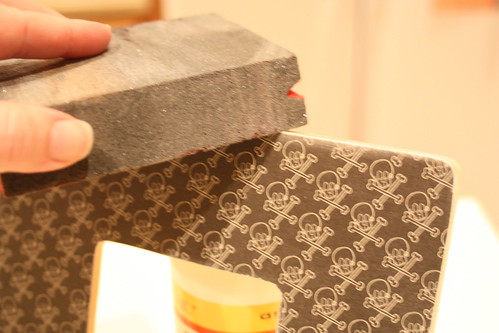
Sanding Block (I used sanding sponge)
Foam Brush
Brayer (you probably could get away with NOT having one of these)
Craft Knife
Rub-on Words (optional)
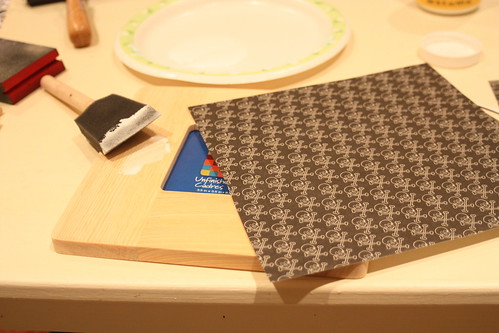
1. Cut paper to fit frame with 1/4 -1/2” overlap.
2. Evenly apply a coat of glue to the top of the wood frame with the foam brush.
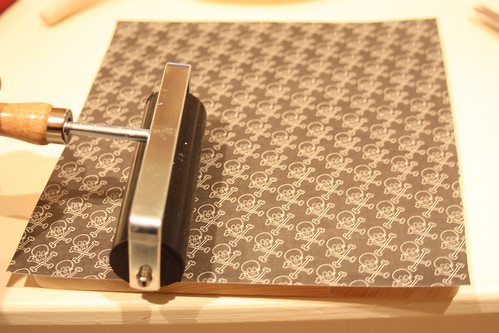
4. Sand away excess edges of paper using the sanding block.
5. Lay the frame flat, paper side down and cut out the middle using your craft knife. Sand these edges.
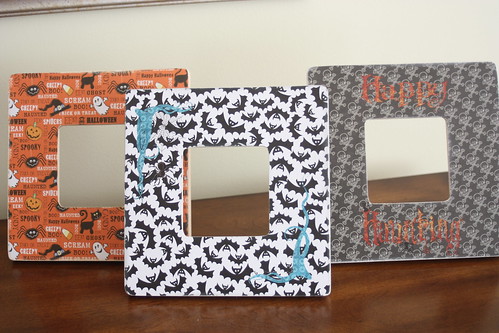
6. Apply rub-on words to frame (optional).
XOXO-


4 comments:
super cute!!!
You should craft more often. These are great :).
Those frames are ADORABLE! What a great way to display pictures of kids in their halloween costumes over the years!
You are too a crafter!
These are definitely adorable. I love them!
Post a Comment